


 Add to Reddit

) |
Part 3 : Flashing The Router Modem
- Install TI Remote Application 2.3, if you have not already done so.
- Connect the modem to the PC via the Ethernet cable. But leave the modem switched off.
- Go to Start -> Control Panel -> Network Connections.
- Look for the Local Area Connection. This refers to the network card connected to the modem.
- Right-click on it and select the Properties option. The LAN Area Connection Properties page will pop up.
- Select Internet Protocol (TCP/IP) before clicking the Properties button.
- Then select the Use the following IP address option.
-
Enter the following values and click OK.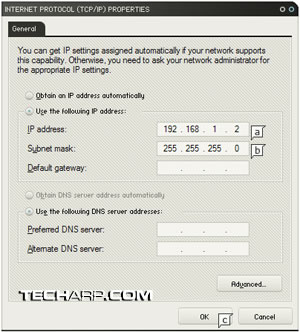
)
IP Address |
192.168.1.2 |
Subnet Mask |
255.255.255.0 |
- Click OK again to close the Local Area Connection Properties window.
- Launch TI Remote Application.
- Here comes the tricky part, which will test your patience. You must click Retrieve/Assign IP Adddress about 3 to 4 seconds after switching on the modem. It took me several attempts to get this right.
|
|
The TI Boot Loader screen |
A successful connection! |
)
)
- After clicking the button, the screen above (right) should appear in less than a second. If not, close TI Remote Application and switch off your modem. Repeat Steps 9 and 10.
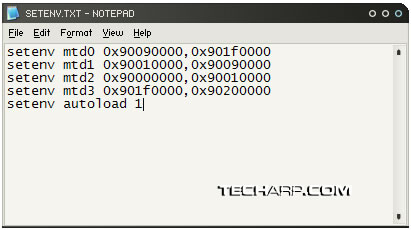
- Now, create a text file using Notepad and name it setenv.txt. Enter the following values according to your modem model.
DSL600E/EU |
DSL600EW |
setenv mtd0 0x90090000,0x901f0000 |
setenv mtd0 0x900d0000,0x903f0000 |
- Here is an example of the values set in the setenv.txt file for the Aztech DSL600E/EU. Save it after entering in the values.
<<< What Do I Need?, Download TI Remote Application 2.3, Download The Appropriate Firmware : Previous Page | Next Page : Flashing The Router Modem (Continued) >>>