


 Add to Reddit

Part 3 : Flashing The Router Modem (Continued)
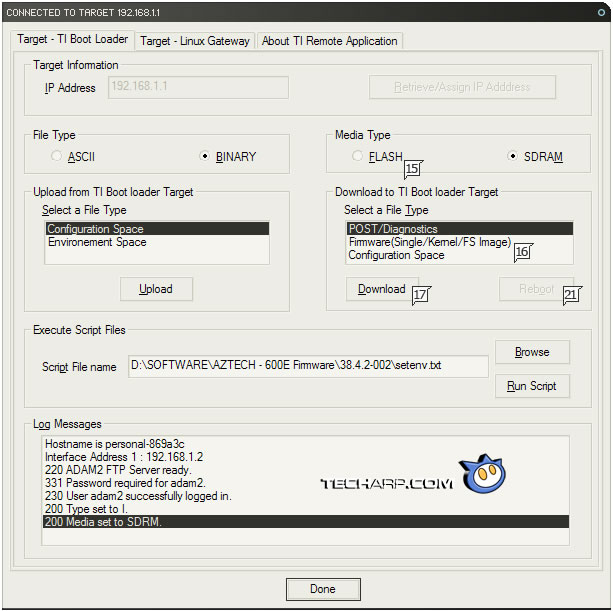
- Click the Browse button and look for the setenv.txt file you created. Select it and the link will appear in the Script File name area. Then click Run Script button.
) |
) |
Loading the setenv.txt file and running it |
Succesfully loading the script |
- Under Media Type, select the FLASH option, instead of the default SDRAM option.
- Select Firmware(Single/Kernel/FS Image), instead of the default POST/Diagnostics option.
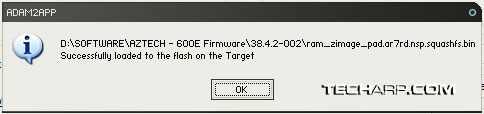
- Then click the Download button. This allows you to select the firmware you downloaded and unzipped earlier. First, select the .bin file (e.g. ram_zimage_pad.ar7rd.nsp.squashfs.bin) and click Open to load it.
- This alert box will appear. Click OK.
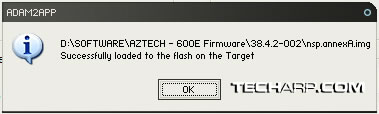
- Repeat step 17, but this time, select the .img file (e.g. nsp.annexA.img) and click Open. This alert box will appear. Click OK.
- You will be asked to reboot the modem. Click Reboot.
-
You can now restore the IP settings in the Internet Protocol (TCP/IP) Properties page. Just select Obtain an IP address automatically and click OK.
- After the modem reinitializes, it should be working normally.
Congratulations! You have just restored your "dead" modem to its fully working condition.