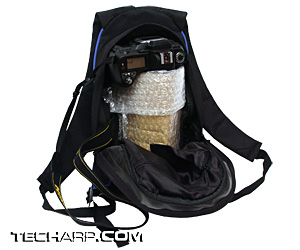
Step 4 : Testing The Fit
Before proceeding further, just try fitting the camera with the protective sleeve into the bag. See if the ensemble fits the bag comfortably. You will want the camera and protective sleeve to slide in easily; and it must be easy to zip the bag close, with everything inside.
If it's a tight fit, you will need to remove the tapes and make the cardboard insert shorter. But if you already made some allowance for additional space during the measurement of the cardboard insert earlier, then you should not face this problem.
Step 5 : Adding A Protective Cap
The protective sleeve is both longer and wider than my camera lens. I intentionally made it that way, so that the sleeve will be able to fit other lenses that I may wish to use it with. Of course, the length of the sleeve is limited by the depth of the bag.
But with longer lenses, it is possible that some lenses may extend right to the end of the protective sleeve. In such situations, a direct fall may crumple the cardboard insert enough to directly impact the lens. Therefore, I decided to add a little insurance - a protective cap at the end of the sleeve.
For such a cap, I simply used some spare polystyrene sheets I had lying around. All I did was fold the polystyrene sheets into a strip about 2 cm wide. I taped the strip up and then folded it into a spiral compact enough to fit the sleeve.
Then I placed it at one end of the protective sleeve and released it. The polystyrene spiral automatically expanded outwards to fit the sleeve. Excellent!
Now, all that remained to be done was to tape the polystyrene spiral to the sleeve so that it formed a protective cap. This will protect the longer lenses from any direct impact from the front.


 Add to Reddit


