The Installation Process
 Since
the base of the heat sink was not pre-coated with any thermal grease, I started
off with the application of thermal grease on the heat sink base. Just to be
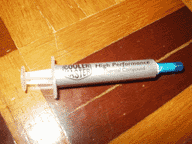
sure, I used my trusty Cooler Master HTK-001 thermal grease, instead of the
thermal grease that came in the package.
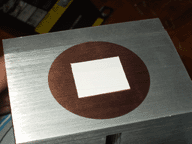
Here's a picture of the HTK-001 thermal grease package and also a picture of what the base of the heatsink looked like after application :-
 The cooler is rather big so
it was a little hard to install. The capacitors on the motherboard were really
close but they did not obstruct the X-Dream. However, because the clip requires
all three slugs on the CPU socket to be properly clipped, it took me quite a
while to fasten the clip properly. The capacitors, while not directly blocking,
were close enough to impede easy installation. You should take note of your
socket and power supply unit (PSU) locations before buying it.
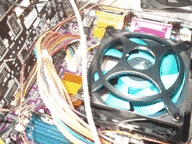
With that said, this cooler is the easiest I have ever installed. The easy clipping is one thing. Unclipping it was easy too! The picture on the left shows how it looks like in the test system. As you can see, the ATX power connector is placed quite far down, next to the AGP slot. The ATX power cable was long enough to go around the fan to reach the power connector.
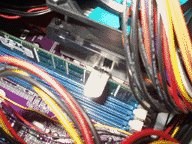 Now, there may be an issue with
the thumb-clip. As you can see in the picture on the right, when installed in
my motherboard, the thumb-clip actually rests right over my RAM slots!
If I were to put in the cooler before installing my DDR DIMMs, the thumb-clip would block the first DIMM slot. So, it would be impossible to install any DIMM into the DIMM1 slot with the X-Dream installed. I will have to install the DDR DIMMs first before installing the X-Dream. Naturally, if I wanted to remove the DIMM from the DIMM1 slot, I would actually have to remove the cooler before I can remove the DIMM. Not a very pleasant thought.
With the DDR DIMM seated in DIMM1, there was just a little clearance left between the thumb-clip and the top of the DDR DIMM. But thankfully, that was just enough to allow the thumb-clip to be used.
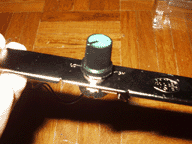 The installation of the fan speed
adjustment knob was a breeze. Just unscrew the bolt from the switch and put
it through the PCI bracket. Tighten the bolt and put the knob on the switch
and you now have a very nice RPM adjustment knob!
The PCI bracket even comes with a tiny hole for the switch to lock onto so that it will remain in position when you twist the knob. Any empty PCI slot will do fine for the PCI bracket.
After completing this final installation step, I booted up my PC. Although I expected to hear a nice humming sound, all I saw was my system bootomg up and shutting down immediately! I peek inside the case and found that the fan wasn't moving!
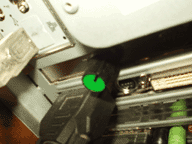 On investigation,
I discovered that it was my mistake as I had connected the 3-pin power connector
to the motherboard but I did not connect the 4-pin connecter to the PSU cables.
I had the impression that the 3- and 4-pin connectors were to provide alternate
means of drawing power. But apparently, the 3-pin connector is only used for
fan speed detection while the 4-pin power connector is where the fan actually
draws power from!
With that settled, the system was very soon up and running with the cooler gently humming in the background. Naturally, my next course of action was to test the fan speed adjustment knob. As expected, the knob worked like a charm.
The fan adjustment feature was very nice indeed. At the lowest speed setting, the fan was almost silent. Well, it was inaudible above the sound of the case and PSU fans. However, at the highest speed setting, the fan is rather loud.
<<< Features, Specifications & Pictures! : Previous Page | Next Page : Testing The X-Dream, Testing Methodology & The Results >>>


 Add to Reddit
