GPU Cooler
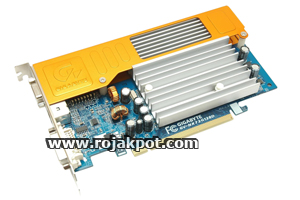
As mentioned earlier, the Gigabyte GV-NX73G128D uses a passive cooler. This is made up of a large aluminium heatsink with an orange shroud. The entire assembly is attached to the card by four screws and two spring-loaded pin clips.
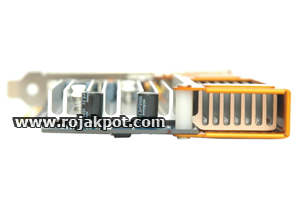
The side view of the cooler shows the configuration of the heatsink fins. Although the heatsink is one piece, it can be divided into a main section with shorter and more spaced-out fins, and a secondary section with taller and more closely-packed fins.
You can also see that the shroud only covers the secondary section of the heatsink. Also, note the white plastic spacer used to keep the shroud in place. We removed the shroud by unscrewing the four screws attached to the plastic spacer.
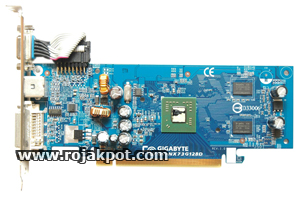
With the shroud removed, you can now see the actual size of the card. If you read our NVIDIA GeForce 7300 GS Tech Report, you will find the design of the Gigabyte GV-NX73G128D familiar. Yes, it's based on NVIDIA's P381 low-profile reference design for the GeForce 7300 GS.
Because of the PCB's low profile, Gigabyte had to attach the 15-pin VGA-out port to the card using a cable. As you can see, the cable is quite unsightly. Fortunately, the shroud hides it from view.
Of course, without a fan, the shroud has practically no positive effect on the heatsink's cooling performance. In fact, it could well reduce its performance by trapping hot air. It probably serves only to improve the card's aesthetic value.
 The heatsink itself is held against the GPU by two spring-loaded pin clips. We then removed the heatsink from the card, just to see what kind of thermal interface was used, as well as peek at the GPU.
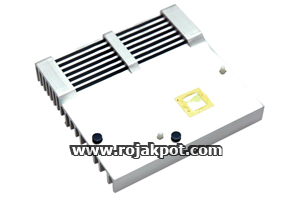
Removing it was easy. Just depress the clips at the end of the pin clips and they will pop out. Pulling off the heatsink, we found that Gigabyte used thermal tape as the thermal interface between the GPU and the base of the heatsink.
There were also two black foam pieces attached to the base. They appear to support the heatsink at the edges and thus prevent it from damaging the GPU when you handle the card.
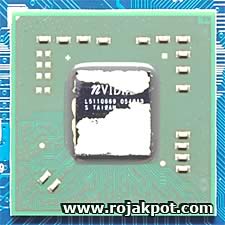
Take a look at the "naked" NVIDIA GeForce 7300 GS GPU. As you can see, it's using the FC-BGA packaging. Thanks to its 90nm fabrication process, the chip itself isn't very big even when there are 112 million transistors inside.
This is what the card looks like without the heatsink and shroud.
The Memory Chips
 Unlike ASUS, Gigabyte chose to use the Hynix HY5PS561621AFP-25 memory chips.
These are 256Mb (32MB) DDR2 SDRAM chips with a rated clock speed of 400MHz and both core and IO voltages of 1.8V. Gigabyte has, however, overclocked them just a little to 405MHz (810MHz DDR).
It would be interesting to see how much further these memory chips will go. Because of the GeForce 7300 GS' narrow memory bus width, its memory bandwidth will be a key determinant of its performance.
This particular card has a 128MB memory buffer. Hence the presence of four of these memory chips, two on each side of the PCB.
But should you require more graphics memory than that, the GeForce 7300 GS supports NVIDIA's TurboCache technology which allows the card to make use of system memory as graphics memory.
External Connectors
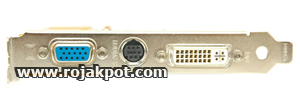
The first picture below shows you the output options on this card. You have the standard 15-pin VGA-out connector on the left, the S-Video output in the middle and the DVI port on the right.
Gigabyte did not include any DVI-to-VGA converter, but if you need two VGA-out ports, you can always buy a DVI-to-VGA converter and convert that DVI port into a second VGA-out port.
Thankfully, the orange shroud covered the cable connecting the VGA-out connector to the PCB. If you don't peek under the shroud, you will never know it was connected by a gray cable.
Although this may seem like a small point, the shroud does make the card look better than its reference design-based competitors. Nothing makes a graphics card look cheaper than a loose cable connecting an output port to the PCB.


 Add to Reddit

