Removing The Keyboard
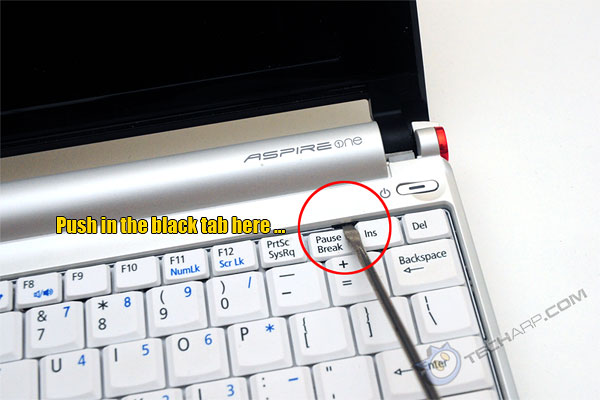
5. Now, flip over the Acer Aspire One netbook and lift the LCD display panel. Look closely just above the Pause / Break key. You will see a black tab which serves to lock the keyboard in place.
6. Use the flat head screwdriver to push the black tab inwards. If you push it deep enough, the keyboard will pop up a little when you remove the screwdriver.
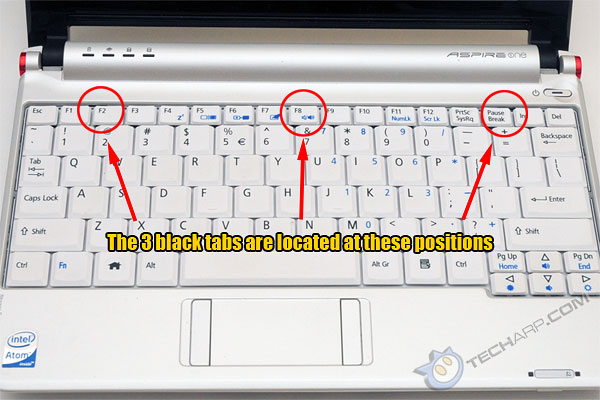
7. There are three black locking tabs in total. The one we showed you first is located above the Pause / Break key. The other two are above the F2 and the F8 keys. Unlock them with the flat head screwdriver.
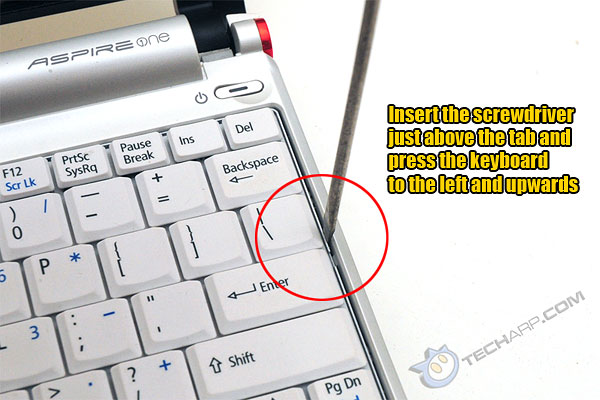
8. If you look closely to the right of the Enter key, you will see a small plastic tab holding the keyboard in place. Gently slide the flat head screwdriver just above that plastic tab, between the keyboard and the case.
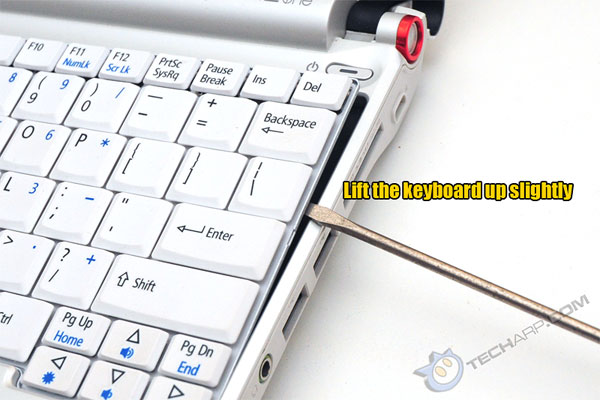
9. Use the screwdriver to press the keyboard to the left so that the tab no longer holds it in place. Then you can lift the keyboard up slightly. Do NOT yank the keyboard out.
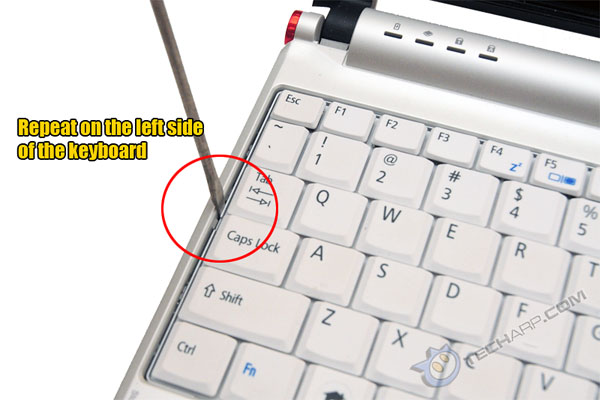
10. Repeat Steps 8 and 9 on the other end of the keyboard. The tab here will be located next to the Caps Lock key.
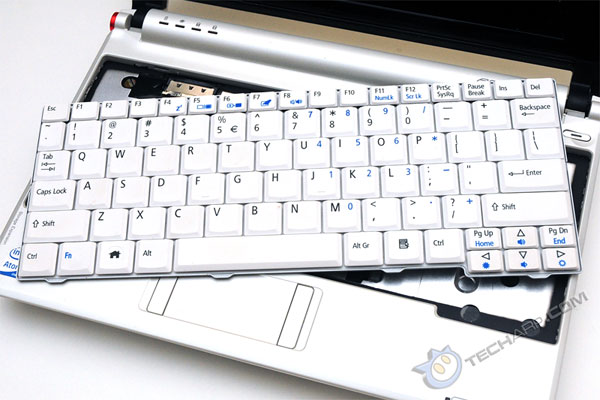
11. With the keyboard unlocked, gently pull the keyboard away but only by a centimeter or so. Do NOT, under any circumstances, yank the keyboard because there's a cable connecting it to the motherboard.
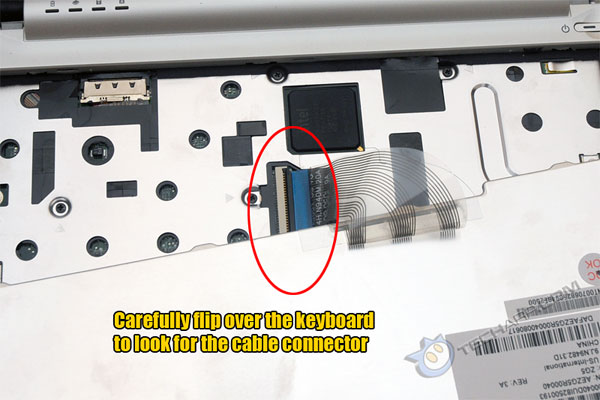
12. Carefully flip the keyboard over and you will see the keyboard cable and its connector on the motherboard.
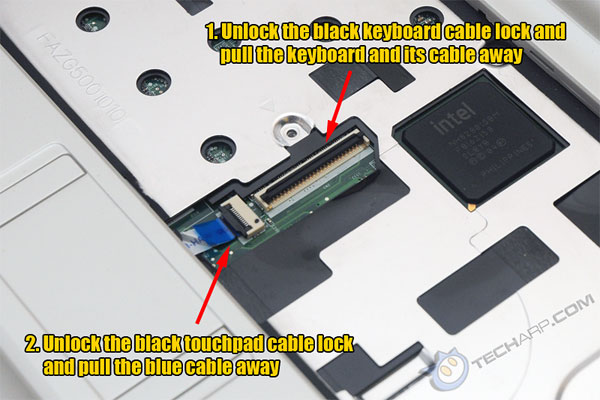
13. Unlock the keyboard cable connector by lifting the black locking tab upwards. Then remove the cable and set the keyboard aside. Right next to the keyboard connector is the touchpad connector. Unlock that too and pull the blue touchpad cable away from it.
Support Tech ARP!
If you like our work, you can help support out work by visiting our sponsors, participate in the Tech ARP Forums, or even donate to our fund. Any help you can render is greatly appreciated!
Page |
Topic |
||
1 |
|||
2 |
|||
3 |
|||
4 |
|||
5 |
|||
6 |
|||
7 |


 Add to Reddit

