


 Add to Reddit

The Front Panel
Now that we know the pins, let's take a look at the front panel connectors.
The front panel usually have one of two types of connectors - split connectors or combined connectors.
For those of you lucky enough to have a case with four connectors for the front jack, they should be labeled as such :-
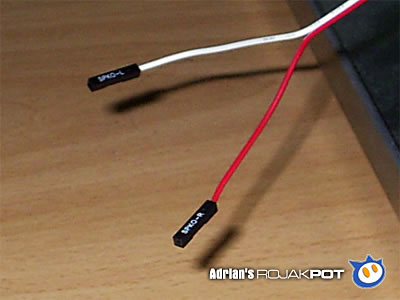
- Spk L
- Spk R
- Ret Spk L
- Ret Spk R
If you have these connectors, your front panel's connectors will usually be of the combined type. Connecting your front panel speaker jack's connectors will be relatively easy. Just connect the "Spk L" and "Spk R" connectors to pins 5 and 9 respectively and the "Ret Spk L" and "Ret Spk R" connectors to pins 6 and 10. You should now be able to obtain audio output from the front panel.
Bear in mind that connecting the front panel speaker jack to the motherboard will automatically disable the back panel speaker jack. This is because the connector sorts of function like a jumper when you attach it to the FPIO2 header.
Most cases, however, will come with two split connectors as pictured below - one for the left channel and one for the right channel.
In this case, if you plug in your front panel connectors, then you wouldn't be able to place a jumper on the FPIO2 header to disconnect the back panel connection. If you leave the jumpers there, then you won't be able to connect your front panel connectors to the FPIO2 header.
There are a few solutions to this problem namely :-
- Get the ABIT Media XP.
- Replace your split connector with a combined connector.
- Run a bypass connector from your front panel to the back panel's speaker jack and connect them with a Y splitter.
- Connect your front panel connector wires to a jumper and connect the jumpers to the FPIO2 header.
In this article, we will go the cheap way and try solution number 4!