A Closer Look
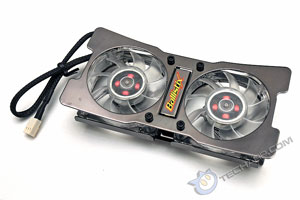
The Crucial Ballistix active cooling fan consists mainly of the actual cooler, and two retention clips. The two fans use a sleeve bearing but the noise level is pretty low at 25-28 dBA, thanks to the relatively slow 3,000 RPM rotation speed. Even so, the two fans push out a reasonable amount of air - 15 cubic feet per minute. Crucial made use of transparent fans so that you will be able to see the LED lights of the Crucial Ballistix Tracer memory modules (or any other memory modules with LED lights) if you have them installed.
 |
 |
 |
 |
The retention clips have foam-padded ends that not only prevent damage to the chromed surfaces, they also help in holding the cooler tightly to the motherboard. Crucial also included a 3-pin to 4-pin Molex adaptor for those who prefer to power the fan using a Molex power cable, instead of a motherboard fan header. As you can see from the manual, the installation process is a breeze. Let us show you just how easy the installation process is.
Installation
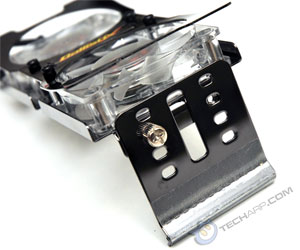
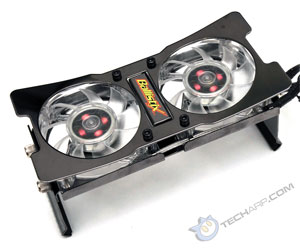
First, you need to determine the height of the cooler over the memory modules. You will want to install the cooler close to the memory modules as possible, but leaving a gap of at least half an inch to reduce the blind spot directly below the fan motor. Every retention clip has four levels of adjustment, represented by the two rows of holes. These holes line up with the two holes on each end of the cooler. When you have decided on a particular height, use the provided screws to lock in the retention clips on both ends of the cooler. Once the two retention clips are locked into place, the cooler should look like the picture on the right.
 |
 |
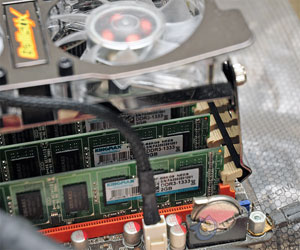
There are two ways to install the cooler. The official way is to flex the fan enough to slip the padded ends of the retention clips over the DIMM slots' retention clips. The other way, which we prefer, is to loosen two of the screws holding the retention clip on one end of the cooler and then positioning the cooler properly over the DIMM slots before tightening the screws to lock the cooler in place.
 |
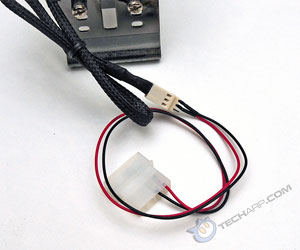 |
Either way, the cooler should sit securely in place over the memory modules. Then all you need to do is plug the cooler's power cable to a standard 3-pin motherboard fan header by default. However, if you prefer to use a 4-pin Molex power connector instead, Crucial provide a 3-pin to 4-pin power adaptor that does the trick.
Support Tech ARP!
If you like our work, you can help support out work by visiting our sponsors, participate in the Tech ARP Forums, or even donate to our fund. Any help you can render is greatly appreciated!
Page |
Topic |
|
1 |
• Crucial Ballistix Active Cooling Fan |
|
2 |
||
3 |
• Testing The Ballistix Active Cooling Fan |
|
4 |
<<< Crucial Ballistix Active Cooling Fan, Specifications, Packaging : Previous Page | Next Page : Testing The Ballistix Active Cooling Fan, Maximum Temperature >>>


 Add to Reddit
