Before You Install The Memory Modules
The Intel Core i7 processor is the first Intel processor to feature an integrated memory controller, which supports DDR3-800, DDR3-1066 and DDR3-1333 memory. The closer integration of the memory controller allows for much better performance. However, the actual installation of the DDR3 memory modules will be no different to the user.
Do note that the Core i7's memory controller only supports a maximum memory voltage of 1.65 V. Using a memory voltage higher than 1.65 V can damage the memory controller, so be sure to select memory modules that do not exceed that limit. There are other caveats you should be aware of. We will discuss them later. First, let's take a look at the DIMM slots.
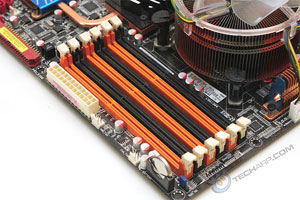
The Intel Core i7 supports up to three memory channels, each with two memory slots. This gives you a maximum of six DDR3 memory slots. Here's a table that summarizes the memory channels and their corresponding memory slots.
Memory Channels |
Memory Slots |
Channel A |
DIMM_A1 and DIMM_A2 |
Channel B |
DIMM_B1 and DIMM_B2 |
Channel C |
DIMM_C1 and DIMM_C2 |
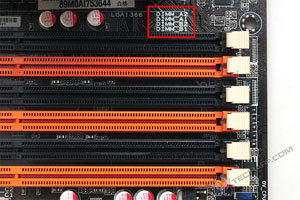
The arrangement of the memory channels and their associated DIMM slots are usually printed on the motherboard PCB, near the memory slots. In the example above of the ASUS P6T Deluxe, the arrangement was printed at the upper right corner of the memory slots.
The arrangement of the memory slots is important because there are certain rules you need to follow when you install the memory modules. So, let's go through them now.
- As mentioned earlier, the memory voltage must be kept at a maximum of 1.65 V. Using a higher memory voltage can damage the memory controller.
- If you only have a single memory module, you must install it in the first slot of any memory channel. That means DIMM_A1, DIMM_B1 or DIMM_C1. If you install it into the second slot of any memory channel, the motherboard will not boot up.
- You cannot install any memory module in the second slot of any memory channel (DIMM_A2, DIMM_B2 or DIMM_C2) if the first slot of those memory channels are not filled.
- XMP DIMMs and DDR3-1600 memory modules are supported but limited to just one DIMM per channel.
- Memory modules using 128 Mb (16 MB) DRAM chips are not supported. This should not be an issue since only 256 MB (or smaller) memory modules use such chips.
Support Tech ARP!
If you like our work, you can help support out work by visiting our sponsors, participate in the Tech ARP Forums, or even donate to our fund. Any help you can render is greatly appreciated!
|
|
Page |
Topic |
|
1 |
|||
2 |
|||
3 |
|||
4 |
|||
5 |
|||
6 |
• Dual / Triple Memory Channel Operation |
||
7 |
• Installing The Memory Modules |
<<< Installing The CPU Cooler : Previous Page | Next Page : Dual / Triple Memory Channel Operation, Recommended Memory Configurations >>>


 Add to Reddit


