The Aerogate II
The Aerogate II is made from high-quality plastic - no cheap stuff here.
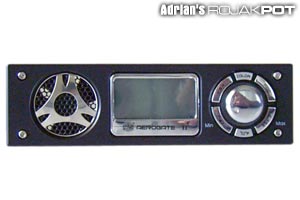
On the left is a circular port covered with wire mesh. That serves as an intake vent for the internal 40mm fan. In the centre is the digital LCD display which shows the temperature and fan speed of the selected device. On the right is a knob for controlling the fan speed. It is ringed by a clear ring with two LEDs.
The colour of the two LEDs can be changed by pressing the button above the knob. You can choose from a choice of pure white, yellow, purple, red, light blue, green or blue lights. The LEDs can also be turned off or set to cycle through all 7 colours continuously which is a little too flashy for my liking. I've taken a recent liking to white LEDs so that's the colour I left the unit on.
The button below the knob toggles between ºC and ºF for the temperature readout, and the other four buttons select the fan and probe combo for the specific component - hard disk, case, CPU and graphics card. The data is then displayed on the LCD screen, and the speed of that fan can be changed by turning the knob.
The knob was a little looser than I expected but having it loose can also be an advantage - it is easier to turn the fan speed up or down.
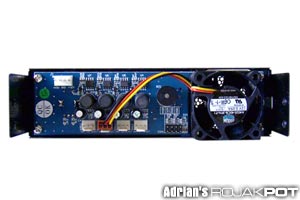
The back of the Aerogate II is where you plug in all the connectors. Let's take a look.
The floppy power connector plugs into the power socket at the upper left corner, while the fan connectors are attached to the four headers at the bottom. To the right of the four fan headers are a cluster of 8 pins. These are for the thermal probes.
Just above the header for the thermal probes is a small speaker that emits the alarm when a fan/thermal probe is not attached; or if the fan runs below 500 rpm. The 40mm fan is on the extreme right. At full speed, its runs at 4000 rpm but any noise it creates will likely to be drowned out by any fans inside the case.
Fan Extension Cables
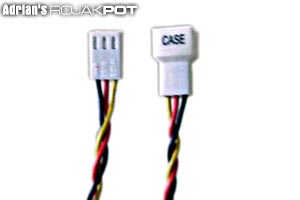
The Aerogate II comes with three fan extension cables for your fans since it fits into the front of your case, where it is quite far from most fans.
The attention to detail on these cables is amazing. Each cable is marked with
a component name (CPU, HDD or Case) to guide you during the installation process.
Trust me, you'll need all the help you can get! The wires are even braided so
that they are not too messy. A very nice touch - I'm a sucker for braided wires.
![]()
Also worth mentioning is the fact that Aerogate II allows a max power output of 18W for each fan channel. This allows it to handle most fans in market. Only the 190 CFM and 220 CFM finger-cutters from Delta will be a problem.
The Aerogate II can control up to four fans (the use of 3-pin splitters notwithstanding), but the Aerogate II's own 40mm fan occupies one of the fan headers. That's why only three fan extension cables are provided, instead of the four we would expect.
Of course, you can always unplug the Aerogate II's 40mm fan and hook up a different fan, provided your fan's wire is long enough! Fortunately, the wire on the Sunon 92mm fan I use in my CPU cooler is long enough. But I still think Cooler Master should have taken this into account and included a fourth fan extension cable.
Thermal Probes
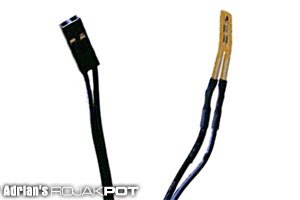
Cooler Master provided four standard thin thermal probes, which makes them easy to place close to CPU or GPU core.
However, one of the probes in my package was not calibrated properly and gave a reading that was 3ºC lower than the actual temperature. Of course, this is not an uncommon issue with such thermal probes. A new one should solve the problem.
The picture below has a 15cm plastic ruler included for easy size comparison. You can see that both the thermal probe and fan extension cable are long enough to allow for easy cable management.
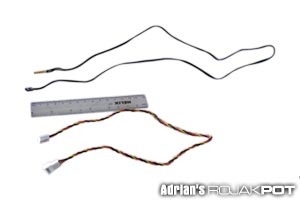
Thermal probe and fan extension cable
The Aerogate II needs to get its power from a floppy connector, and a Molex-to-floppy converter is included. However, it would have been even better if Aerogate II comes with a splitter cable ending in one floppy connector and one Molex connector. This is because some PSUs come with limited Molex connectors. In my case, the PSU only has two Molex connectors which were already in use by two optical drives.
Luckily, I had a Molex splitter on hand. Otherwise, some re-wiring would have been required. Perhaps Cooler Master should follow the approach taken by graphics card manufacturers in providing a splitter cable whenever an external power connection is needed.


 Add to Reddit

