Installing The CPU
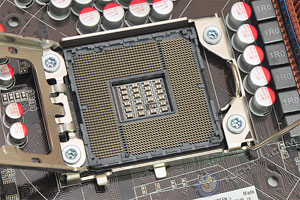
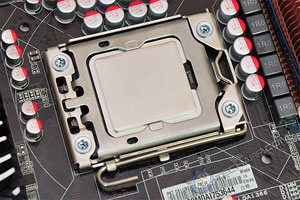
This is how the LGA1366 socket looks like after you remove the plastic cap. Note the fine, tightly packed pins. They are the delicate part of the socket so do NOT exert excessive pressure when you install the CPU.
The socket is designed so that the CPU will only fit in a certain orientation and no other. If you align the CPU the right way, it will go in easily. If it doesn't seem to fit the socket properly, do not force it in. Take it out and check its orientation.
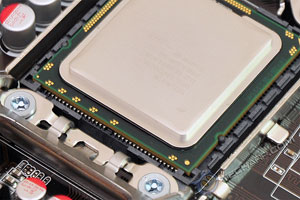
The orientation in the LGA1366 socket is controlled by two "alignment keys". You can see them in the picture on the right as two small, round plastic knobs at the top and bottom of the socket to the left of the centerline. They fit into notches on the CPU, and thus prevent it from being installed in the wrong orientation.
Step 5 : Note the two notches at the edge of the Core i7 CPU. Align them with the round "alignment keys" on the LGA1366 socket. You should be able to easily drop the processor into the socket.
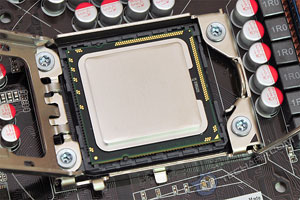
Step 6 : If the Core i7 CPU is installed correctly, the top of the green circuit board should lie flush against the top of the socket. Do not proceed unless you are sure it is properly seated.
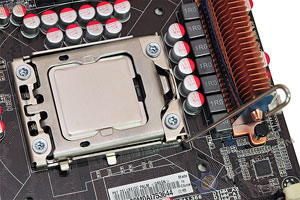
Step 7 : Replace the metal socket cover. It will be quite loose, so press down on it before you push the J-shaped lever into place. Otherwise, it can flip and damage the socket or processor.
Step 8 : Press down the J-shaped load lever, and hook it in place. This will secure the Core i7 processor in its socket.
Support Tech ARP!
If you like our work, you can help support out work by visiting our sponsors, participate in the Tech ARP Forums, or even donate to our fund. Any help you can render is greatly appreciated!
|
|
Page |
Topic |
|
1 |
|||
2 |
|||
3 |
|||
4 |
|||
5 |
|||
6 |
• Dual / Triple Memory Channel Operation |
||
7 |
• Installing The Memory Modules |
<<< Introduction, Preparing The Socket : Previous Page | Next Page : Before You Install The CPU Cooler >>>


 Add to Reddit

