Installation
Installation was straightforward, but what took us by surprise was the fact that the entire installation file was only 10MB in size! Like Microsoft, Adobe was never known for producing applications with a small footprint.
On closer inspection, this is not the full package and contains only the working application. The help files and other media files were not included. Nevertheless, such a small size is quite an achievement, especially for a beta application.
Main Interface
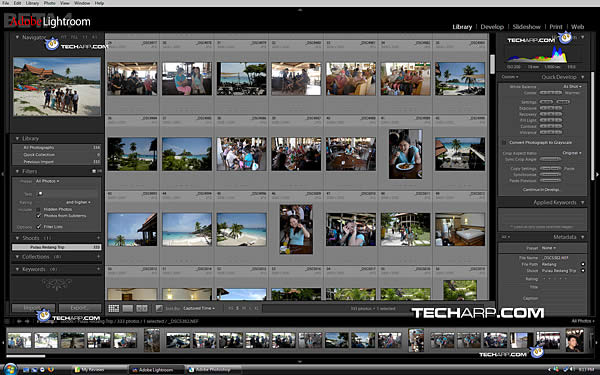
First of all, Adobe Lightroom does not look anything like Photoshop or any of Adobe's other photo-editing software. It is radical and I love it! The designers must have taken some cues from Apple Aperture and rightly so!
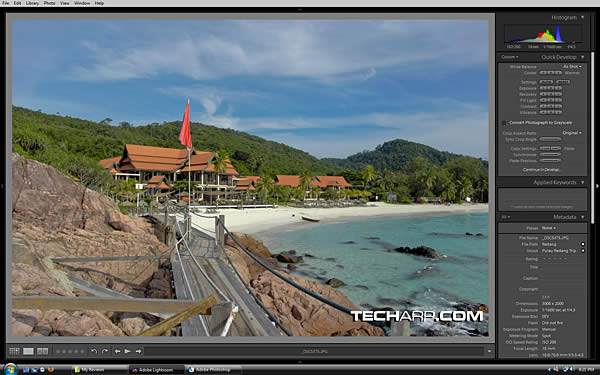
The first thing you would notice is the dark-grey colour scheme. It is pleasant to the eyes and looks very professional. The fonts used looked good while critical information like Picture ISO, Shutter speed, Histogram and Aperture were displayed at strategic locations.
The whole screen is basically divided into five different areas, which we would refer to as the Top, Bottom, Left, Right and Centre panels.
It's clear that Adobe Lightroom was created for those who are more than just keen in photography. For example, terms like Shoots, Collections and Develop were alien to me. But I'm sure we can all pick it up soon enough!
Top Panel - Module Picker
First, let's take a look at the top panel or the Module Picker. It contains the Library, Develop, Slideshow, Print and Web module link.
This is basically the process flow of getting a photo from the camera out to the lab or the Internet. Switching to a different module brings up different set of tools in the left and right panels.
The Library module consists of tools that help the photographer import the photos into Lightroom, view the photos and make basic adjustments.
The Develop module is where the real work tools are. Photographers can touch up the photo using the comprehensive array of tools at their disposal. There is a History tool that keeps track of the changes that are applied to each photo.
The Slideshow module allows the photographer to view the photos or even showcase touched-up photos to their clients.
Photographers can set their printing options at the Print module. This module has quite a number of options that will make printing at home or the office a piece of cake.
Finally, the Web module allows photographers to publish their pictures on the Internet.
Bottom Panel - Filmstrip
The Bottom Panel is basically a film strip. All photographs in a Shoot or Collection will be displayed as a film strip here.
In the Develop module, selecting the photo in the film strip will bring that photo up for editing. Regardless of which module you are in, the Filmstrip panel will always remain in sight.
<<< Introduction, Adobe Lightroom Beta 4, Tools : Previous Page | Next Page : The Library Module >>>


 Add to Reddit


