


 Add to Reddit

Resonance Coupling
Wacom has a whole page complete with diagrams to illustrate how this work but I’ll just give you a simple explanation. Although I can’t find the exact white paper for the Volito but the principle should be the same as that found on other Wacom products.
The tablet is the main work horse here. It supplies all required power for signal transmission and reception. The grid of wires covering the active surface of the tablet first sends signals to the stylus and then switches to receiving mode. Through a process called resonance coupling, the stylus coverts the received signal to power, which is used to run the chip embedded within the stylus.
This chip compiles its data and sends it to the tip which transmits the data signal to the tablet. The tablet picks up the data from the stylus' tip to determine its position and other information like pressure. And all this happens every 20 microseconds or so.
The Mouse
The mouse is just like any other two-button cordless mouse you can get in any computer store. Flip it over and you notice something odd - there is no mouse ball or even an optical sensor. Just a smooth surface.
And just like the stylus, the mouse requires no batteries to run! But it is actually slightly heavier than my IntelliMouse Optical, probably due to that metal weight which is vaguely visible through the semi-transparent cover.
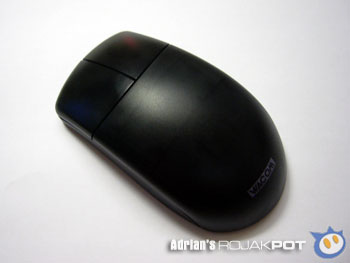
I have no intention of prying open the mouse and voiding the two-years warranty I have on it so that’s about as far as I can go on the hardware side.
Now, let's see what software was packaged with the Volito. There was, of course, the driver CD which contained the necessary drivers, documentation and a tutorial on how the use the stylus. There were also two CDs containing bundled software. I’ll go into their details later.
Let's take a quick look at the Wacom Volito's technical specifications before testing it out!