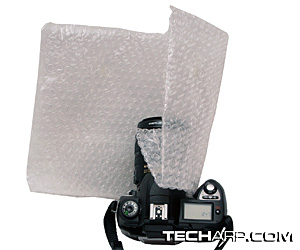
Step 1 : Determining The Appropriate Size
The first step would be to determine the appropriate size of the protective sleeve. This depends very much on the depth of the bag as well as the size of the camera and lens.
To find the appropriate size, just wrap some bubble wrap around the lens. This will give you a rough idea of how wide the protective sleeve should be. Please remember to add a little extra space to allow for wider lenses and/or lens hoods.
Then, slide the entire ensemble into the bag and see if the bubble wrap fits the bag. If the bubble wrap is too long, fold it until the camera can be seated easily within the bag. If it's too short, then lengthen it. Just remember to leave some extra space to allow for easy closure of the bag.
Step 2 : Preparing The Cardboard Insert
Once you have used the bubble wrap to determine the appropriate length of the protective sleeve, it's time to prepare the cardboard insert. I use a piece of corrugated cardboard so that the sleeve will be rigid enough to withstand a direct impact without crumpling too much. The cardboard insert will also serve to transmit any direct force to the tough camera body.
Using the bubble wrap as a template, find out the appropriate length and width for the cardboard. Make sure it fits comfortably within the folded bubble wrap. Please remember to cut along the corrugations of the cardboard, not perpendicular to them.
Once you are certain about the size of cardboard that you need, cut off the excess portions. After resizing the cardboard insert, try fitting it into the folded bubble wrap. Make sure it fits the bubble wrap. You can cut out excess bubble wrap or you can use the rest to provide additional cushioning.
<<< What Is A Camera Bag?, The Idea, Is It Difficult? : Previous Page | Next Page : Creating The Protective Sleeve >>>


 Add to Reddit


