The NVIDIA Control Panel
 |
It is very easy to overclock the NVIDIA GeForce GTX 295. All you need to do is download and install their nTune utility or the newer System Tools with ESA Support. We will take a look at how System Tools works. System Tools is very similar to nTune.
NVIDIA System Tools consists of two components - the NVIDIA Control Panel and the NVIDIA System Monitor. The NVIDIA Control Panel is what you are looking for.
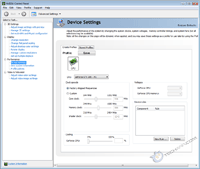
Load it up and you will gain access to a boatload of motherboard (if your motherboard has an NVIDIA chipset) and GPU settings to mess with. To overclock the GeForce GTX 295, head over to Performance -> Device Settings.
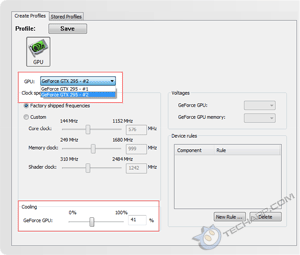
Here, you will find more than just the options to overclock the GeForce GTX 295's two GPUs individually. It also provides you with the option to directly modify the fan speed. In the screenshot on the right, the GeForce GTX 295's fan speed appears to be wrong at 0%, but that's only because the card has a single fan and it's controlled by the second GPU. The fan is set to run at just 41% of its maximum speed, so it has plenty of headroom for us to play with.
For some reason, the current NVIDIA Control Panel does not display the GPU's temperature, as it should. The GPU core and memory voltages are also not shown and cannot be modified. That aside, there's still much we can do. Let's get down to business.
Overclocking The GeForce GTX 295
First, let's give that fan a big boost! For maximum overclocking potential, let's ramp that fan all the way up to 100 %! The improved cooling performance will greatly improve the overclockability of your GeForce GTX 295 graphics card.
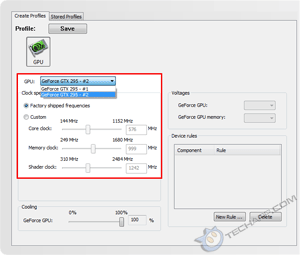
In the older Control Panel, you have to click on a Direct fan control option before you can directly modify the fan speed. This is no longer necessary in the latest NVIDIA Control Panel. First, switch to the second GPU by selecting GeForce GTX 295 - #2 under the GPU list. This exposes the fan control for the card, which is at 41% by default.
Now, move the slider all the way to the right (to 100%) and click on the Apply button. You will know you did the right thing if you hear the GeForce GTX 295's fan spin up to a pretty loud whine. It may not be what you are comfortable hearing day in and day out, so feel free to adjust the fan speed to a noise level that's tolerable to you.
With that done, it's time to manipulate the core and memory bus speeds. The older NVIDIA Control Panel automatically scales the shader clock (which runs at a different clock speed) with the GPU core clock speed. The latest NVIDIA Control Panel, however, allows you to directly modify the shader clock speed. For the purpose of this guide though, we will sync the shader clock to the GPU core clock.
It is never a good idea to overclock both the core and memory clocks simultaneously. Doing so makes it almost impossible to pinpoint the cause when the overclock fails. So, always overclock one component at a time. Choose either the core or the memory clock. It doesn't matter which you choose.
Do remember that the NVIDIA GeForce GTX 295 has two GPUs. You will need to manually adjust the core, shader and memory clock speeds for both GPUs - one at a time.
Support Tech ARP!
If you like our work, you can help support out work by visiting our sponsors, participate in the Tech ARP Forums, or even donate to our fund. Any help you can render is greatly appreciated!
<<< Overclocking The NVIDIA GeForce GTX 295 : Previous Page | Next Page : Overclocking The Graphics Memory, Overclocking The GPU >>>


 Add to Reddit


