


 Add to Reddit

Eroded Lens Coatings
|
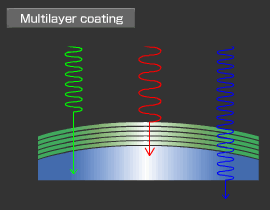
The elements of most lenses come with a coating to reduce light reflection and boost light transmission. High-end lenses actually feature multiple layers of different coatings which boost light transmission up to 99.9%!
These coatings, while not fragile, are not exactly tough either. Exposure to harsh environments, solvents and even incessant rubbing with cleaning fluid can erode the coating of the front and rear elements.
To check for eroded coating, you should first remove the dust and oil off the
front and rear elements. Start by blowing off dust on the front element with
a rubber blower. Don't blow on it with your breath - your spittle will make
things worse! ![]()
After blowing the dust away, apply some methyl alcohol or lens cleaning solution onto a good lens cleaning pen or lint-free lens paper. Apply the wet pen or paper onto the surface of the front element in circular motion, starting from the center and working your way to the sides. Of course, if you are using the carbon-based cleaning pen, you will not need any alcohol or cleaning solution.
|
|
)
)
Clean up the alcohol or cleaning solution with a piece of dry lens paper. The front element should now be clean of dust and oil. If necessary, do the same for the rear element. Once done, you will be ready to examine the lens elements for eroded coatings.
Now, look at the front and rear elements in bright light. By varying the angle of the light and the angle at which you examine both elements, you can see if the coatings are eroded. You can also look through the lens at a bright light source. The bright sky or a sun-lit wall works well too. By varying the distance of the lens from your eyes, you can focus on the different elements in the lens and look for eroded coatings.
) |
Slightly eroded coatings should not affect picture quality. Significant erosion though will reduce light transmission in affected areas and give your pictures a blotchy look. You may also notice less contrast and more flaring with eroded coatings.
You can check by using the lens to take a picture of the bright sky at the smallest aperture possible. You should, of course, take the biggest picture possible with fine JPEG compression. Next, extract the picture and examine it at 100%. If you do not see any variation in light intensity in the picture, then you have confirmed that the eroded coatings do not affect picture quality.
If the erosions affect picture quality, you should really forget about buying the
lens. Repairing it may cost you quite a bit of money, unless you can buy the
replacement element cheaply in online auctions. If the erosions do not affect picture quality, you can still use that as a
tool to help you bargain down the price of the lens. Just remember that someone
else will do the same to you when it's your turn to sell the lens! ![]()
Scratched Lens Elements
Many photographers protect their lens glass by covering the front element with a UV or skylight filter. This keeps the front element free of any scratches as well as oil and dust. If you buy lenses from these photographers, you can be assured that the front elements are in pristine condition.
However, there are those who believe that filters distort light entering the lens and reduce the quality of the pictures taken. Unless they are well-taken care of, the front element will often be scarred with scratches as well as dust and oil.
Large scratches should be quite obvious, even if the front or rear elements is covered with oil and dust. Unless they are really large or deep, these scratches should not affect picture quality. This is especially true for scratches on the front element. Large scratches are more of a problem with the rear element. It should be as scratch-free as possible.
) A relatively deep scratch on a front element of this lens |
) Several light scratches on the rear element of this lens |
Fine scratches are much less of a problem, even if there are quite a lot of them. However, if you want to check for scratches, you should first remove the dust and oil (see Eroded Lens Coatings above). Once done, you will be ready to examine the lens elements for scratches. Look at the front and rear elements in bright light. By varying the angle of the light and the angle at which you examine both elements, you can see if there are any scratches.
You can also look through the lens at a bright light source. The bright sky or a sun-lit wall works well. By varying the distance of the lens from your eyes, you can focus on the different elements in the lens and look for fine scratches.
If you want to be sure that the scratches do not affect picture quality, you can check by using the lens to take a picture of the bright sky at the smallest aperture possible. You should, of course, take the biggest picture possible with fine JPEG compression. Next, extract the picture and examine it at 100%. If you do not see any artifacts in the picture, then you have confirmed that the scratches do not affect picture quality.
If the lens has scratches that affect picture quality, you should think twice
about buying it. Repairing it may cost you quite a bit of money, unless you
can buy the replacement element cheaply in online auctions. If the scratches do not affect picture quality, you can still use that as a
tool to help you bargain down the price of the lens. Just remember that someone
else will do the same to you when it's your turn to sell the lens! ![]()
Chipped Lens Elements
Sometimes you will find lens being sold with a chipped element. Usually, this will be the front element. You should be able to spot large chips in the element instantly although smaller chips may require a closer look.
Depending on the location, the chips may or may not affect the performance of the lens. If the chips are small and are at the periphery, they won't affect picture quality. However, if they are big or situated in the center of the lens, this may cause flaring or artifacts. Chips in the rear element are more serious than those in the front element. So, make sure you examine the rear element as well.
) This skylight filter saved a Nikkor lens from damage! |
) The minor chip on the front element of this Sigma zoom lens was the end result of an unwanted encounter with a hard object. This is why you should always protect your lenses with filters. |
You can check the effect of these chips by using the lens to take a picture of the bright sky at the smallest aperture possible. You should, of course, take the biggest picture possible with fine JPEG compression. Next, extract the picture and examine it at 100%. If you do not see any artifacts or abnormal flaring in the picture, then you have confirmed that the chipped element does not affect picture quality.
If the chipped element affects picture quality, you shouldn't bother buying the lens. Repairing it will cost you a substantial amount of money, unless you can buy the replacement element cheaply in online auctions. If the chipped element does not affect picture quality, you can still use that as a tool to help you bargain down the price of the lens, although it will make it a lot more difficult to resell the lens in the future.
Support Tech ARP!
If you like our work, you can help support out work by visiting our sponsors, participate in the Tech ARP Forums, or even donate to our fund. Any help you can render is greatly appreciated!
<<< Damaged Lens Motor, Malfunctioning IS, Oily Aperture Blades, Sticky Aperture Blades : Previous Page | Next Page : Separated Lens Elements, Loose Elements, Damaged Contacts, Lens Fungus >>>
Support us by buying from Amazon.com! |
|
| Grab a FREE 30-day trial of Amazon Prime for free shipping, instant access to 40,000 movies and TV episodes and the Kindle Owners' Lending Library! | |