


 Add to Reddit

The ARP MegaPak Battery Extender
Required Components
Here is the list of parts I used to build my MegaPak battery extender :-
| Parts | Units | Price | ||
| RS | RM* | USD* | ||
| Sunca SLAB - 6V - 4500mAh |
1 unit | 170.00 | 14.17 | 3.73 |
| 2-Conductor
Insulated Wire with a Coaxial DC Power Plug (Sony type) |
1 unit | 40.00 | 3.33 | 0.88 |
| Red coloured insulated wire | 25 cm x 2 | 2.00 | 0.17 | 0.04 |
| White coloured insulated wire | 25 cm x 2 | 2.00 | 0.17 | 0.04 |
| RCA connectors | Male x 2 Female x 2 |
18.00 | 1.50 | 0.39 |
| 7.5V AC/DC adapter | 1 unit | 60.00 | 5.00 | 1.32 |
|
Total Cost |
292.00 | 24.34 | 6.40 | |
| *
Converted from Indian Rupees (RS) based on the exchange rates of approximately :- RM 1 : RS 12 USD 1 : RS 45.6 |
||||
Surprised? Yeah, the whole enchilada won't cost you the kitchen sink. All in all, you need to spend less than RM 25 or USD 7 and that includes a 4,500 mAh SLAB as well. Isn't that affordable?
Of course, the quality of some of these components leaves much to be desired.
The 4,500 mAh Sunca SLAB (Sealed Lead Acid Battery) and the insulated
wire-power plug combo were the only things that were of acceptable quality.
The other parts... yuck! But considering the place I'm in, well, that's the
best I could do. Unless you live in Manipal, India, you can do a lot
better.
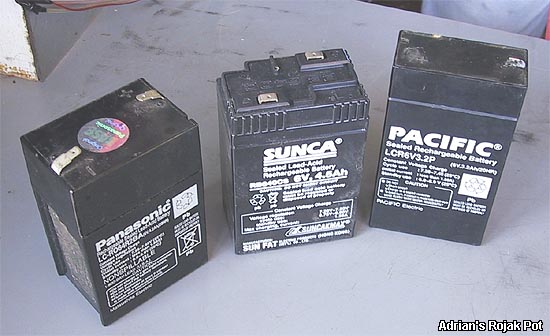
Various SLABs
Since SLABs are more or less about the same in weight and bulk, you should get one with the best capacity. The higher the capacity, the longer the battery expander will last. Also, get the bent power plug like the one used in this project. Once inserted into the Pocket PC (or any other portable device), it will lie flushed against the casing and not protrude out like a sore thumb.
By the way, note that SLABs provide 6V of power which is a lot more than what portable devices normally run at. So, make sure your portable device can take 6V safely before you go ahead with this project. I have only tested my 6V MegaPak on my Casio Cassiopeia E-125 Pocket PC. Not all portable devices can support a 6V power input.
Now, get your soldering iron, some solder (and flux) as well as a wire cutter and let's get down to work!
<<< The ARP MiniPak Battery Extender: The Completed MiniPak Battery Extender : Previous Page | Next Page : The ARP MegaPak Battery Extender: Building The MegaPak >>>