What Is A Camera Bag?
To be honest, the fundamental difference between a camera bag and any other bag is really nothing more than just padding. If you forget all about the fancy designs, reinforced straps and weather-proof covers, what do you get? Padding.
The padding of a good camera bag is what protects your camera and lenses from damage if you ever drop the bag. No, all that fancy quick-access zip locks or double-stitched straps, or even the weather-proof cover is not going to be of any help if gravity snatches the bag from your hands.
Whether your camera and lenses survives a fall or not, depends entirely on the bag's
padding. If there is sufficient padding, then they will have a good shot at
surviving the fall. That's the only thing that will save them from damage. Otherwise... 
Of course, I'm not disparaging 'real' camera bags. If I can afford one, I would love to own a good camera backpack. It's always nice to have adjustable padding, a good harness, a built-in tripod belt and, of course, the professional look.
But until that day arrives, I will have to innovate and create my own camera
backpack! Yes, that's the purpose of this guide, if you haven't already phantomed
it yet. ![]()
The Idea
Most DSLR bodies are really tough and can take a lot of abuse. But lenses are a totally different thing. This is especially true if you want to store your camera in the top-loading fashion.
Top-loading your camera allows quick access to the camera but if you drop the bag, the camera's lens will bear the full brunt of the impact. Needless to say, without proper padding, there's no way the lens can survive a direct impact. Not with a heavy DSLR body behind it.
Even padding alone isn't sufficient. You can place a thick layer of foam or bubble wrap at the base of any bag but can you ensure that the camera stays upright in the bag? If the camera can move around in the bag, there's a good chance that the bag may not fall on its base but rather on the sides where the lens has no protection. This negates the effectiveness of any padding you place at the base.
So, I decided to create my own bag which would not only allow me to store the camera in a top-loading form but also protect the lens by reducing the force of any impact on the bag's base and transferring any remaining force directly to the camera body. In addition, the lens will be protected from side impacts.
Doing that is pretty straightforward. All I need to do is build a protective sleeve for the camera lens. This sleeve will not only protect the lens from direct impact, it will also protect it from side impacts as well as transmit any direct force to the camera body.
Is It Difficult?
Well, it's not as easy as buying a bag but it's really not very difficult. And it's certainly very cheap! In fact, you can do it for absolutely nothing at all! All you need are just :
- A bag
- Corrugated cardboard
- Bubble wrap
- A box-cutter
- Cellophane tape
Yeah, that's it! As you can tell, this is a very low-budget project. In fact, it can be totally free, if you have those items lying around.
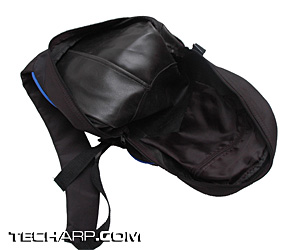
For this guide, I chose a small backpack that came free with the purchase
of two cartons of canned drinks.  It's an ordinary backpack made from nylon, with absolutely
no padding inside.
I'm sure you can find something similar. Maybe an old bag you no longer need. Any bag will do, just as long as it's a bag you are comfortable carrying and of course, it has to be large enough to fit your camera and lens.
 |
Okay, you got everything ready? Then, let's proceed! ![]()


 Add to Reddit

