


 Add to Reddit

ED#180 : How To Switch The Location Of The Apple iTunes Backup Folder
 Although Apple iCloud allows you to back-up the most important data on your iDevices, the Apple iTunes is still the ultimate backup option, unless you opt to pay for additional iCloud storage. This is because it allows for the full backup of all your iDevices on your computer. The downside though is the prodigious amount of space it needs to back-up your iDevices.
While iTunes is smart enough to skip the apps (which can always be downloaded) and store only the databases of those apps, it will backs-up photos and videos that are still in your Camera Roll. If you take a lot of photos and videos with your iPhone, iPad or iPod touch, the backup can run into tens of gigabytes, especially if you own several iDevices.
This can be a problem for those who are using a solid state drive as they have limited storage capacity, so every gigabyte counts. Most SSD users would prefer the iTunes backup to be stored on a secondary drive, usually a hard disk drive. Unfortunately, Apple iTunes does not allow the backup files to be stored anywhere but on the boot drive itself.
This presents a problem for those who are either using a very small drive, or have partitioned the boot partition to be small. The lack of storage space may force you, the user, to stop backing up your iDevices, and could potentially result in lost photos and videos should your iDevice fail for whatever reason.
Apple has not seen it fit to provide us with a solution to the problem, but we have just the trick to allow you to use a separate partition or drive to store the iTunes backup files. Check it out!
Bitcoin malware infects Apple iAd!
Just Move & Switch
-
First, shut down Apple iTunes, if it's still running.
-
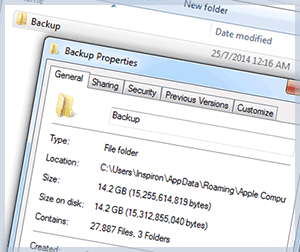
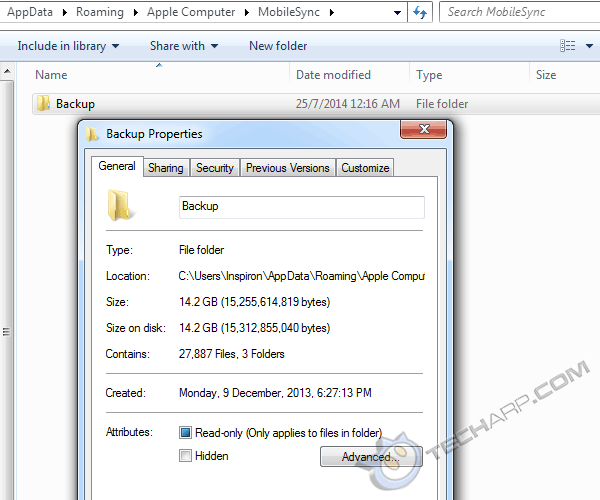
Open Windows Explorer (Windows + E) and navigate to C:\Users\User Name\AppData\Roaming\Apple Computer\MobileSync.
Alternatively, you can type %AppData% into the address bar of Windows Explorer and then navigate to Apple Computer -> MobileSync.
-
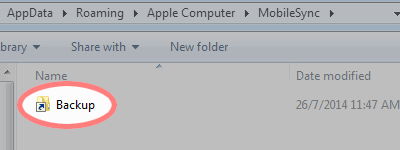
Once there, you will see a Backup folder. This is the folder that contains all of the iTunes backup files.
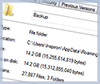
Right click on the Backup folder to check how much space it is taking. This is an important step as you will need to move the folder to a partition with enough space (and then some for future use).
-
Once you know how much space you need, create a folder in a partition or drive that has plenty of space. You can call it iTunes Backup for example.
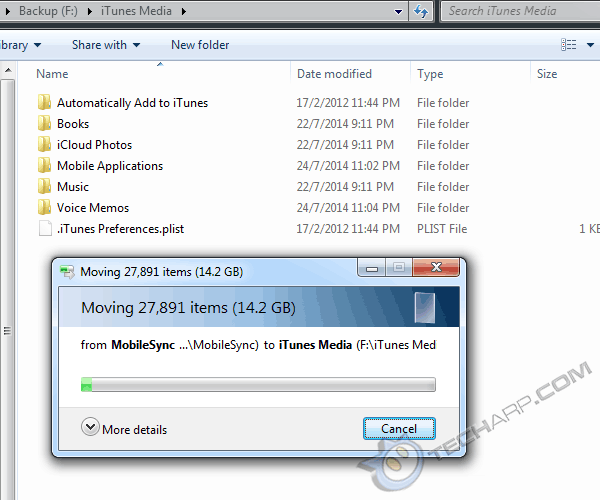
In our example, we had already moved the location of the iTunes Media folder to drive F, so we decided to move the Backup folder there without creating a new folder.
-
Move the existing Backup folder from C:\Users\User Name\AppData\Roaming\Apple Computer\MobileSync (or %AppData%\Apple Computer\MobileSync) to the new folder in your partition or drive of choice.
Wait until you have finished moving all of the Backup folder to the new partition / drive.
-
Next, you will have to fool Apple iTunes by creating an NTFS junction point. Think of it as a more powerful version of the Windows .lnk shortcut.
-
To do this, open up the Command Prompt in Administrator mode. You can do this by searching for "cmd" and right clicking on it and select "Run as administrator".
-
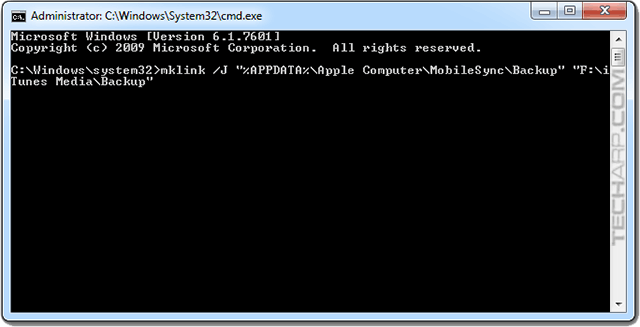
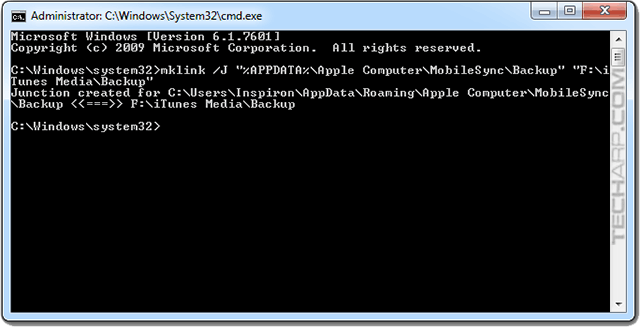
Option A : In Command Prompt, type mklink /J "%APPDATA%\Apple Computer\MobileSync\Backup" "the new location of the backup folder" and press Enter. In our example, the new location of the Backup folder is at F:\iTunes Media\Backup.
Option B : You can also type the full address as follows - mklink /J "C:\Users\Inspiron\AppData\Roaming\Apple Computer\MobileSync\Backup" "the new location of the backup folder" and press Enter.

-
Once you press Enter, Windows will instantly create a junction that will automatically redirect all reads and writes to the orignal Backup folder to the new Backup folder location in the new partition or drive. Apple iTunes will never know the difference.
-
If you navigate back to C:\Users\User Name\AppData\Roaming\Apple Computer\MobileSync (or %AppData%\Apple Computer\MobileSync), you will see what looks like a Backup shortcut. That's the NTFS junction.
The change takes immediate effect, and no restart is required. The next time you use iTunes to backup your iPhone, iPad or iPod touch, the backup files will be stored in the new Backup location, ensuring that your boot partition never runs out of space.
How to fix the Apple iCloud (missing contacts) bug
| If you like this article, please share it! -> |
Other Scoops
- Why It's Really Time To Ditch (And Strip) The Short Filename
- AV-Optimized Hard Disk Drives Are Safe To Use
- All Halfbrick Studios iOS Games Are FREE!
- TrueCrypt Developer Drops New Bombshell
- How To Integrate Cloud Storage Services With Microsoft Office 2013
- The Mystery Of TrueCrypt's Disappearance
- Windows May Fail To Boot Up After Installing Latest IE Patch
- Intel Xeon "Haswell Refresh" CPU Details Leaked
If you have a scoop you want to share with us, just contact us! It doesn't have to be Apple-related. It can be anything in the tech industry, from mobile phones to P2P software. Just drop us a message!
Support Tech ARP!
If you like our work, you can help support out work by visiting our sponsors, participate in the Tech ARP Forums, or even donate to our fund. Any help you can render is greatly appreciated!
Support us by buying from Amazon.com! |
|
| Grab a FREE 30-day trial of Amazon Prime for free shipping, instant access to 40,000 movies and TV episodes and the Kindle Owners' Lending Library! | |
Questions & Comments
If you have a question or comment on this editorial, please feel free to post them here!
Date |
Revision |
Revision History |
| 30-07-2014 | 1.0 |
Initial Release. |